Ubiquiti Unifi Network Setup Guide
Introduction
Upgrading from your ISP’s provided modem/router/access point combo device can improve your WiFi signal, strengthen your device connections, and increase the number of devices you can connect to your home network. A good network is the backbone to any strong smart home.


Many homes these days don’t have a home network beyond their ISP’s provided device(s), and their smart home performance can suffer because of it. You can fix your home network issues by setting up a UniFi network at home. Ubiquiti’s UniFi line of devices are a popular choice when first getting started with home networking. Ubiquiti’s devices are touted as ‘prosumer’ devices, meaning they have many professional level functions available, but are ultimately priced and designed for the general public.


In this guide, you will learn you how to set up a network using Ubiquiti’s UniFi line of devices and a Raspberry Pi running the UniFi Controller.


Supplies
Hardware and Peripherals
- A Raspberry Pi with UniFiPi Installed Or other UniFi Controller Device
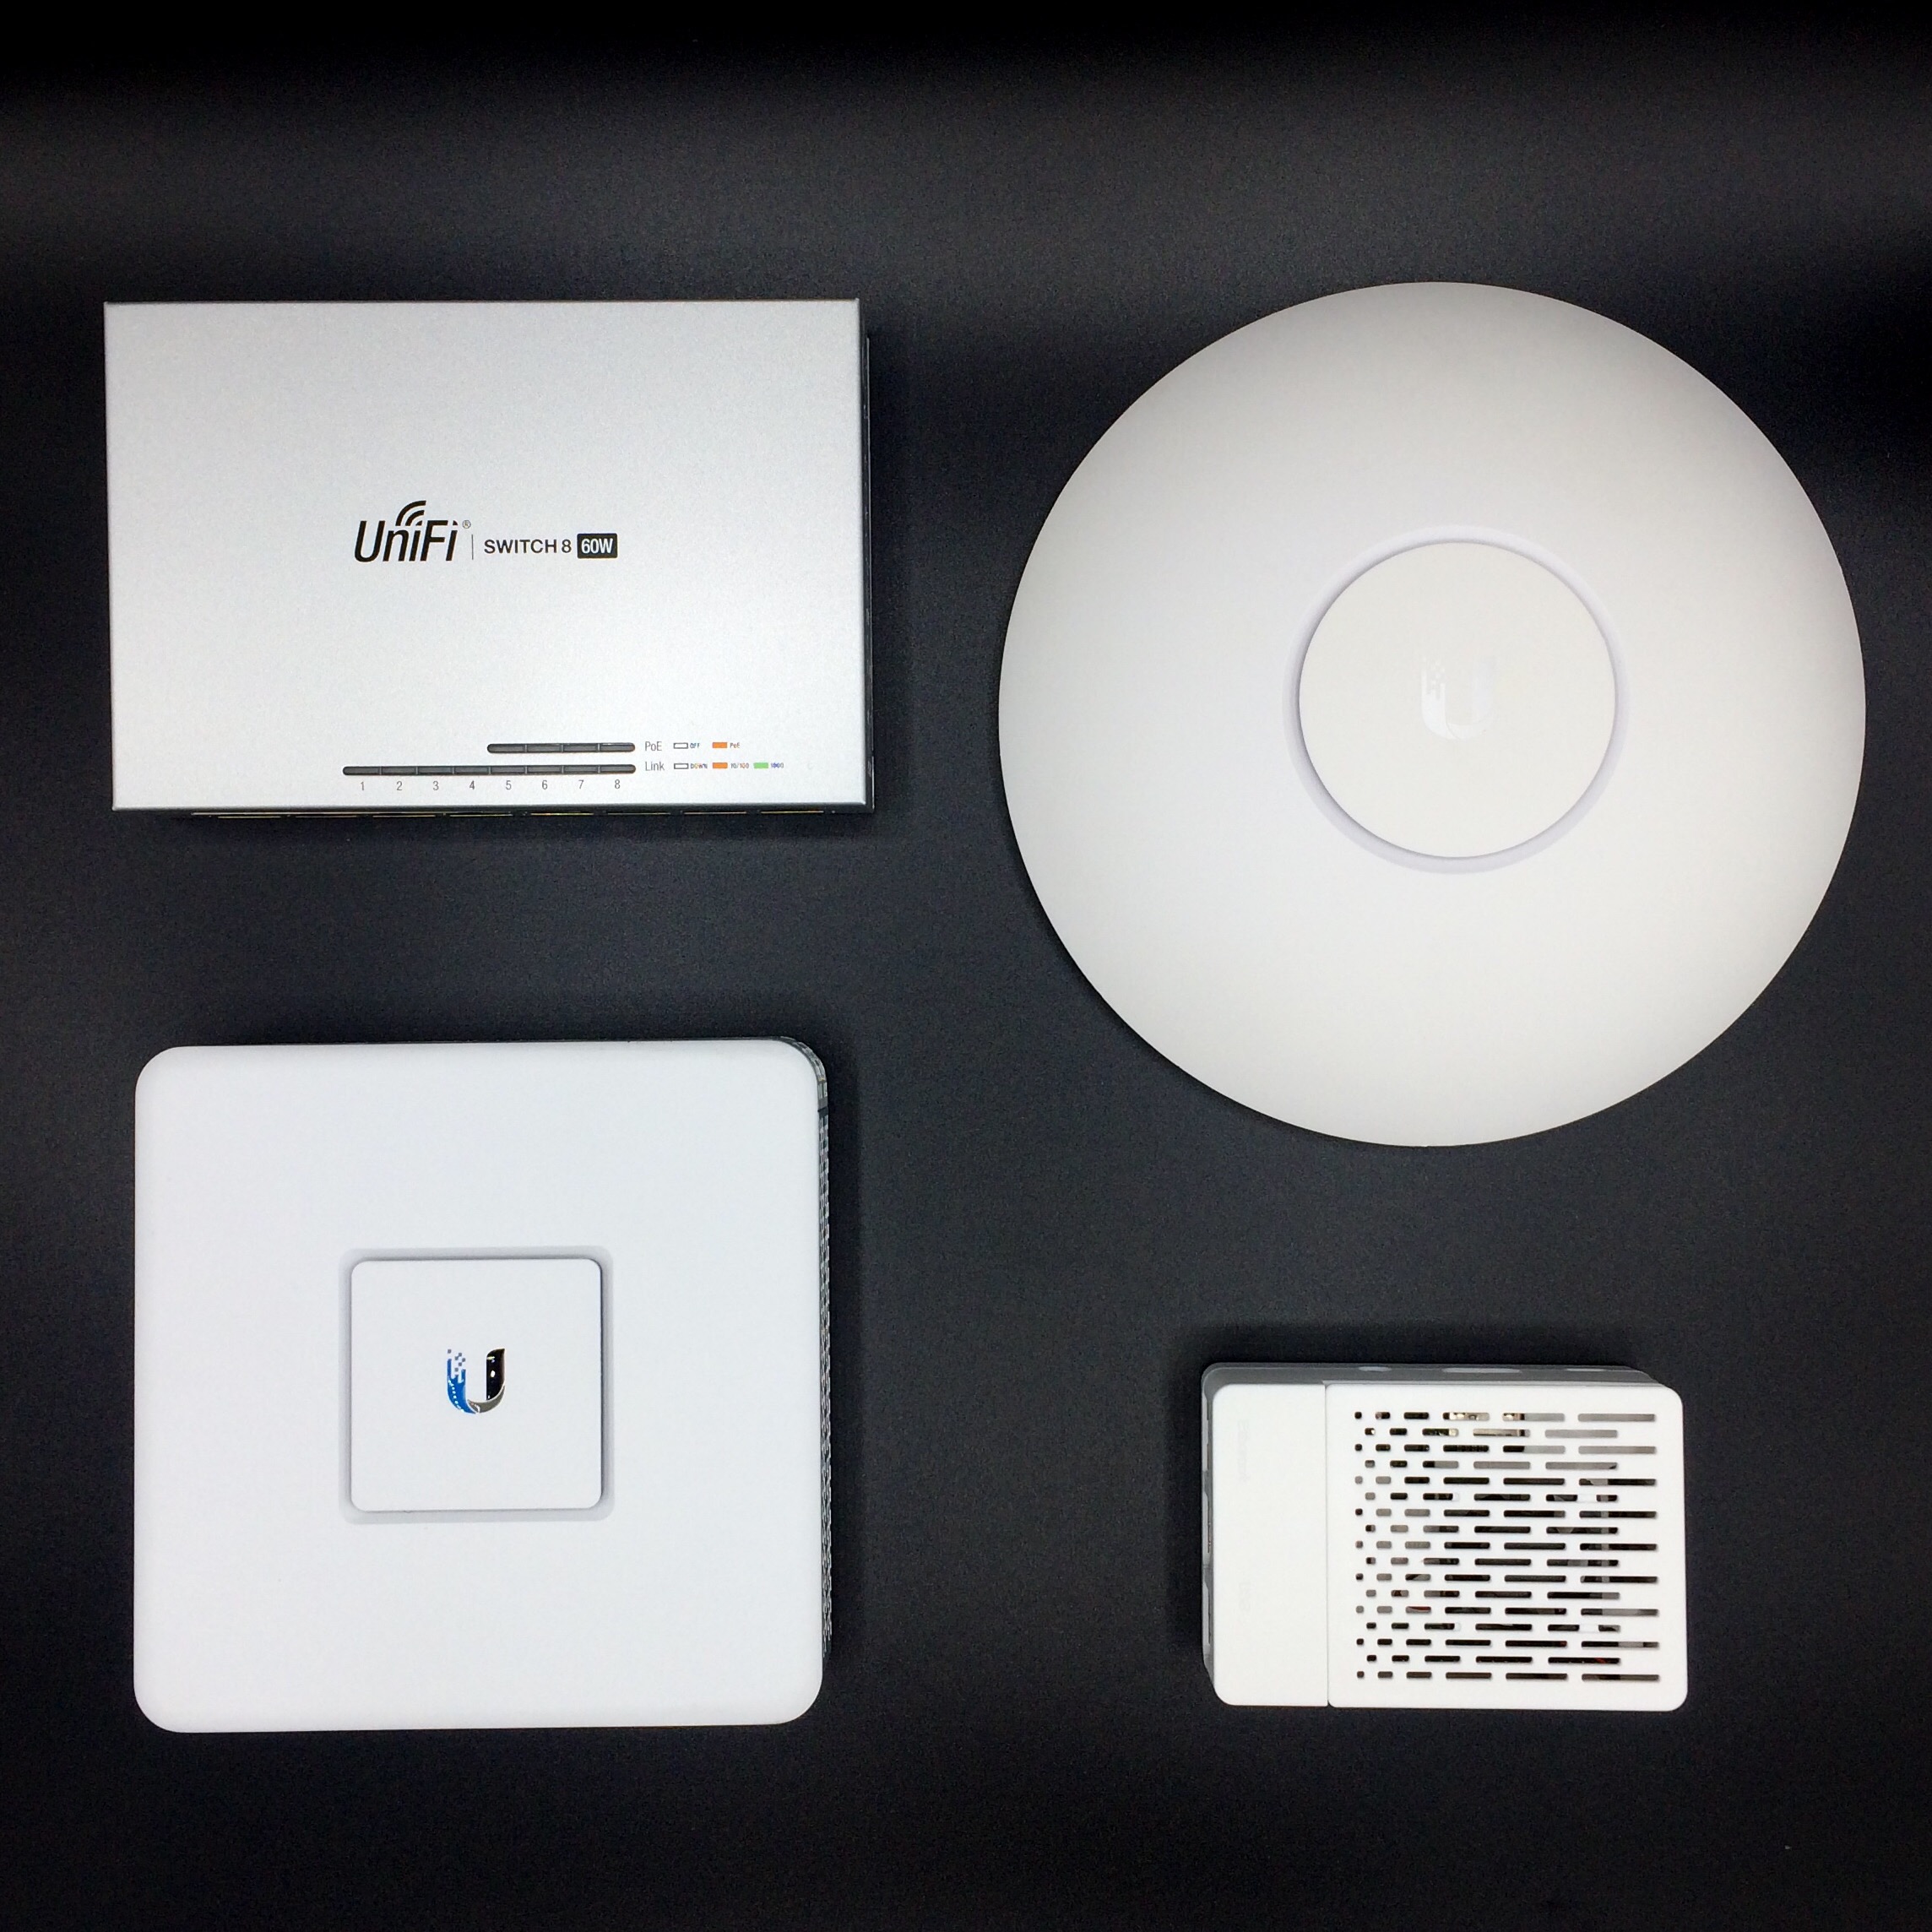
- A UniFi Security Gateway (USG)
- A UniFi Switch
- A UniFi Access Point (AP)
- 5 Ethernet Cables
- A Power Strip
- A Modem with Bridge Mode Capabilities This can be your ISP provided device as long as it has bridge mode. Sometimes this can be done by logging into the modem, sometimes you will need to call the ISP to put it into bridge mode.
Prepare Your Network Devices:

- Before working with any of your devices, you will need to create a Ubiquiti account.
- Connect all of your devices together, using Ethernet cables.
- Connect the LAN 1 port on the USG to one of the ports on the Switch.
- Connect the AP to the switch using one of the PoE OUT ports.
- Connect the Raspberry Pi to the Switch.

- Now, plug all of the devices into the power strip and turn the power strip on. Wait about 5-10 minutes to allow everything to power on. This will also give UniFiPi time to boot up for the first time.
- When everything is powered up, the lights on the UniFi devices will flash white. This means they’re ready to be set up.
Set up Your UniFi Network


- Connect your ISP modem to the WAN IN port on the USG.
- Put your modem into bridge mode and turn off your computer’s WiFi.

- Connect your computer to the switch with an Ethernet cable.
- Open your web browser, and connect to http://unifipi.local.8443.

- Click through the warning to access the controller setup page.
- The warning is here because your browser thinks you might be visiting a dangerous site. Since you are visiting a site that is hosted on your Raspberry Pi, it is safe to disregard the warning.


- Name your controller.
- Log in with the Ubiquiti account you created at the very beginning of this guide.
- Select whether you would like to automatically optimize your network as well as enable auto backups.


- Set your SSID (WiFi Name) and password, and if you would like to combine your 2 GHz and 5GHz WiFi networks.
- You can set your SSID and password to match the credentials you were using on your ISP provided device. This will make it so all of your devices can automatically connect as soon as your new network is up and running!
- Select all of the devices you want to adopt onto your network.
- Lastly, review your configuration.

- Now the configuration will take place, this may take a couple of minutes.

- Your browser may lose connection while the UniFi devices set up and provision.

- The devices’ lights will turn blue after they’re set up.


- When your browser refreshes, you will see your UniFi Dashoard for the first time. It may say your network needs attention. This is likely because your UniFi Devices are updating themselves.
- You can check the status of the updates from the Devices tab on the left side of the screen. While updating, your connection may cut in and out until it’s finished.
- You will see a notification to update the controller. Ignore this for now, you will update the controller a little later.

- Once everything is updated, you should be all set up. If you used the same SSID as the one you were using before, your clients list should start populating as devices connect.
There are a few more steps left, but this is a good spot to take a break.
Additional Setup Adjustments
Internet Capacity

The Internet Capacity measurement on the dashboard shows your traffic compared to your service provider’s capabilities. To get a more accurate reading, you will need to change the Download and Upload settings in Settings -> Site -> Provider Capabilities. This section is prefilled with 10 Mbps Download and 1 Mbps upload. Change this to whatever your current subscription plan provides. It can also be changed based on running a speed test which can be done from your dashboard.
RF Environment Scan

If the WiFi Traffic Distribution on your dashboard is less than great, you can adjust this by running a scan of the RF environment. Navigate to Devices -> Select Your AP -> Tools -> Scan.
Configure Clients

You can add an alias and update the icon for any of your connected clients. Select a client from the Clients tab. In the Details section, navigate to Device Fingerprint. You can change the icon here. From the Configuration section, you can add an alias.
Download the App

The UniFi app can be downloaded on both, the App Store as well as Google Play.
Head Back to UniFiPi.com

Finally, you should go back to UniFiPi.com. There, you will find instructions on how to update your UniFi Controller and change your default password. You can even install Pi-Hole, a network wide ad blocker, on your UniFiPi.
Conclusion
Now you should be running your very own home network, or at the very least know how to set one up. Great job! From here on out, you will have more options available to you regarding how you want to run your network at home. This is a good time to set up some networking rules to isolate your smart home devices from the rest of your network.
Alternatives
If you are not interested in creating your own UniFi Controller, you can purchase a Cloud Key, or you can utilize the new Unified Dream Machine (UDM). The Unified Dream Machine combines the UniFi Controller, USG, Switch, and AP into one single device.
Extra Help
Did you find an error or need some extra support? Please reach out in the comments and I will do my best to help!
-Alex


Hello, this was just what I was looking for and successfully got it up and running, Only problem is , its created a new site, I have an existing one with my switch and access points, how would I add it to that ? It was not seen as a new device ready to be adopted on my site. Thanks
Hey Phil!
I haven’t adopted the devices in that order before, but think it should still work. I found this online that will hopefully get your pointed in the right direction.
https://help.ui.com/hc/en-us/articles/236281367-UniFi-USG-How-to-Adopt-a-USG-into-an-Existing-Network