Install Home Assistant on a Raspberry Pi
Getting your smart home devices to play well together can pose a real challenge. In steps Home Assistant. Home Assistant is an open source software that you can use to automate your house. It can integrate with devices made by different manufacturers. While there are a lot of install options, Home Assistant recommends the Raspberry Pi as an affordable and easier way to get started. This guide will walk you through the install and onboarding process for installing Home Assistant onto a Raspberry Pi.


Supplies
Hardware
- Raspberry Pi – The computer that will run Home Assistant.
- Ethernet cable – To connect the Raspberry Pi to your home network.
- Micro SD card – The Micro SD card will hold the Home Assistant operating system and information.
- A 32 GB card is recommended.
- Definitely use a Class 10 card. Lower class cards can cause the system to crash often.
- Micro SD card reader to connect the card to your computer.


Software
- Etcher – The program will flash Home Assistant onto the Micro SD Card.
- Home Assistant – You will need to download the correct version of Home Assistant for your Raspberry Pi.
Prepare Your Micro SD Card
To begin you will first need to prepare your SD card. To do this, you will download Home Assistant and put it on a micro SD card.


- Visit Home Assistant’s GitHub page to find the install package for your device.
- If you’re using the Raspberry Pi 4, scroll down to select the file hassos_rpi4-X.XX.img.xz. The X.XX represents the current version available. This example will show hassos_rpi4-5.12.img.xz
- The 8GB version of the Raspberry Pi 4 should use the hassos_rpi4-64-X.XX.img.xz file indicating 64-bit.
- After you download your file, open Etcher.
- Click Flash from file and choose your Home Assistant file.


- Insert your blank Micro SD card, and find it in the Select target screen.
- Click Flash!


- Etcher will begin by decompressing your file.
- Next, it will flash the file to the Micro SD card.
- Finally, Etcher will validate the flashing and unmount the card.

- When you see this screen, the flashing is complete. Etcher will automatically unmount your Micro SD card, so it is safe to remove.
Install Home Assistant
With the micro SD card prepped, you’re ready to set up Home Assistant. This next section will cover the installation process, finding Home Assistant’s IP address, and walk you through the Home Assistant onboarding process.

- Insert the micro SD card into your Raspberry Pi.
- Plug the Raspberry Pi into a network port on your switch or modem/router device. Then connect the Raspberry Pi to a power outlet.
- Home Assistant will start updating as soon as it is plugged in.
- Log in to your modem/router device and look for homeassistant among your connected clients. Make note of the IP address.
- It may take 5-10 minutes of loading before homeassistant is visible among the rest of your connected clients.

- Open a new tab and navigate to Home Assistant.
- If your computer is on the same network as your Raspberry Pi, then you can access Home Assistant at http://homeassistant.local:8123/.
- If your computer is on a different subnet than Home Assistant, you will need to use the device’s IP address instead. http://YOURIPADDRESS:8123/
- You can see in the example image, this instance is found at http://192.168.1.6:8123/.
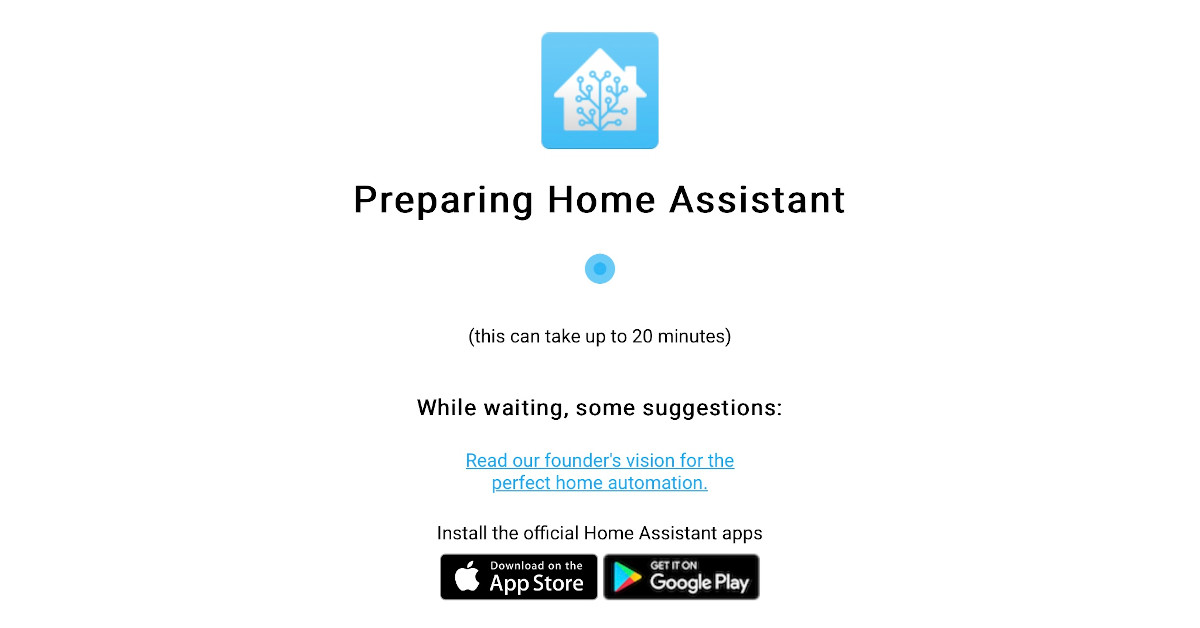
- You should see the Home Assistant icon and a notice that it is Preparing Home Assistant and may take up to 20 minutes; depending on your internet speeds and Raspberry Pi choice.

- When Home Assistant is finished with updates, you will likely lose connection. After reconnecting you should see the Create Account page.
Home Assistant Onboarding
During Home Assistant’s onboarding process, you will tell it who you are, where you are, and can even set up some smart devices you may already have connected to the network.

- Provide your name, a username, and password to create an account.
- This is a local username and password used to log in to your specific Home Assistant instance.


- Name your home, save your location, and select your preferred unit system.
- This next section is optional. Here you can click More and connect some of your smart devices. This option is also available inside of Home Assistant, so it is safe to skip.

- Lastly, you will be taken to your new default view.
Conclusion
Home Assistant is a great system for connecting and controlling all of your smart home devices. Now that you have it set up, you can add smart devices, connect your subscriptions, and start automating your smart home. If you’re ready to get started, check out Smart Home Hobby’s Quick Overview of Home Assistant.


